
String Crossing Technique
Share This
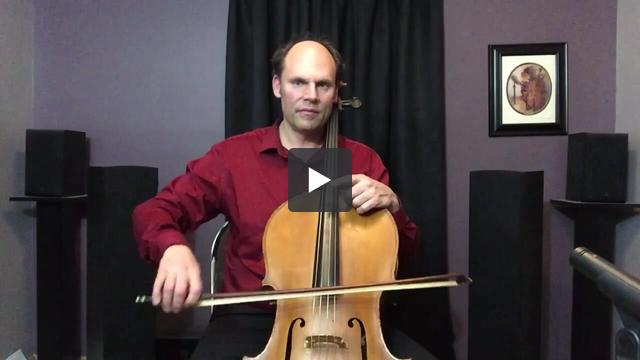
This video and article deal with string crossings on the cello. The primary focus is on fast string crossings and the techniques involved with them.
When we think of fast playing on the cello the first thing that often comes to mind is the left hand. We forget, however, that we also need a fast bow arm, not only to execute quick up bows and down bows but also string crossings. The cello repertoire is replete with passages that demand fast string crossings. The question is, how do we do this given that our arm is rather heavy and doesn't lend itself to quick upward and downward motions.
First, what not to do!
To begin with, let's discuss what to avoid when executing fast string crossings. I find that student cellists are often “one trick ponies” when it comes to string crossings; specifically, many rely on whole arm movements. This may work for a while until the repertoire gets more challenging. However, it is simply too difficult to execute fast string crossings moving the entire arm.
Some other options
So, what are some of the alternatives to using the entire arm? To begin with, there is a long tradition of using the wrist in string playing for string crossings. In the Grutzmacher daily exercise, for example, he includes little arrows pointing up and down above the notes for moving the wrist up and down during string crossings. This is a better alternative to using the whole arm for fast string crossings; after all, moving the wrist takes a lot less energy than moving the entire arm. The problem I have with it, along with many other cellists, is that it tends to be very taxing on the wrist. Is there a way to use larger muscle groups to do the same thing?
I am of the view that we don’t need a lot of active motions in the wrist or fingers of the bow hand in cello technique. Most of what we need can be done with the arm coupled with passive movements in the wrist and fingers. This is also true in string crossings.
The Forearm “Dip”
Instead of moving the wrist up and down, we can rotate our upper arms in our shoulder socket, resulting in the forearm moving up and dipping down. I call this the "Robot Wave" when teaching younger students (it kind of looks like a robot wave, doesn't it?). If we couple this with a passive motion in the hand (wrist), the result is a very efficient and effective way to execute string crossings that does not tax the wrist. This is, of course, much easier to demonstrate visually so I encourage you to watch the video on this page.
Stir the Cake
The rotational movement in the upper arm results in a change of string level but what movements do we use for the up and down bows? In fast playing, I recommend using the forearm as in the forearm détaché bow stroke. When teaching younger students, I call this the "Door on a Hinge". You will need to combine the "Robot Wave" with the "Door on a Hinge" to achieve the necessary motions for fast string crossings. The resulting motion is what my undergraduate teacher called "Stir the Cake" as in stirring cake batter. Again, this is much easier to show visually so I refer you to the video on this page.
Teeter Totter
When doing the robot wave or stirring the cake, the upper arm will move in the opposite direction of the hand. When the hand and forearm dip down the upper arm will move up in the opposite direction, kind of like a teeter totter. So, the upper arm will move up and down, it's just that you want it to move in the opposite direction of the hand, not in the same direction as the hand.
Clockwise and Counterclockwise
When using the "stir the cake" technique, you will either move in a clockwise or counterclockwise fashion. If the lower string is an up bow and the upper string a down bow, the forearm and hand will move in a clockwise manner (from the player's perspective). If the lower string is a down bow and the upper string and up bow, the forearm and hand will move in a counterclockwise direction (again, from the player's perspective).
The down bow of the clockwise version moves with the arc of the bridge. The down bow of the counterclockwise motion moves against the arc of the bridge. To see this demonstrated please check out the video on this page.
I find the clockwise movement to be more conducive for faster playing and more effortless. The counterclockwise direction I find best for digging into the string but it tends to be slower and a bit more labored.
Passive Wrist Motion
I encourage you to read my article on passive wrist motion and my article on passive and active motions. These are complementary to this article and video.
Passive motions are those that are not caused directly but are the result of an active motion or motions in another part of the body. If the wrist is relaxed, the "stir the cake" motion will result in a passive motion in the wrist.
One of the advantages of passive motions is that they reduce the amount of movement needed in active motions. By adding some passive wrist motion to the "stir the cake" the arm doesn't need to move much at all.
Keep the Movement Small
When doing a fast string crossings, I recommend bowing on the right side of the upper string and the left side of the bottom string. This keeps the movement to a minimum. If I bow on the left side of the upper string and the right side of the bottom string, the movement in my arm will be huge and slow me down.
Fast String Crossings that are Slurred
If you need to play fast string crossings with long slurs, I recommend keeping the elbow up during the course of the whole bow, using the robot wave as described above. As you approach the tip of the bow the motion and the arm will become greater and as you approach the frog the motion will become smaller. As a general rule, remember to bow on the right side of the top string and the left side of the bottom string.
Using Gravity and Passive Finger Motions at the Frog
This technique is tricky to describe apart from a demonstration. Essentially, when at the frog you can make a string crossing to the string above it by allowing gravity to do its job by "pulling" the tip of the bow down. Your ring finger and pinky can bend passively while this happens. The video example will hopefully make this much clearer!
S.D.G.
Authored by Jamie Fiste, Professor of Cello at Central Michigan University.