
How to Hold the Cello
by Jamie Fiste, Professor of Cello, Central Michigan University
Share This
Holding the cello involves several considerations; posture, body type, use of gravity, projection, and tilt. My overall approach to cello technique is to avoid a static technique (fixed positions) in favor of a dynamic one (fluid, adjusting, adapting) and holding the cello is no exception.
Posture First
Before delving into holding the cello, it is important to begin with a balanced position on a chair that is the proper height. So I encourage you to first read the article on posture and watch the video before proceeding any further.
The idea is to first achieve balance with a lengthened spine before bringing the cello to your body. We bring the cello to us. We don't bring ourselves to the cello. The cello accommodates us. We don't accommodate the cello. Balance and posture first. Holding the cello second.
Establishing a Cello Hold
There is a quick way to help a student find the correct cello hold that also works well in a classroom situation.
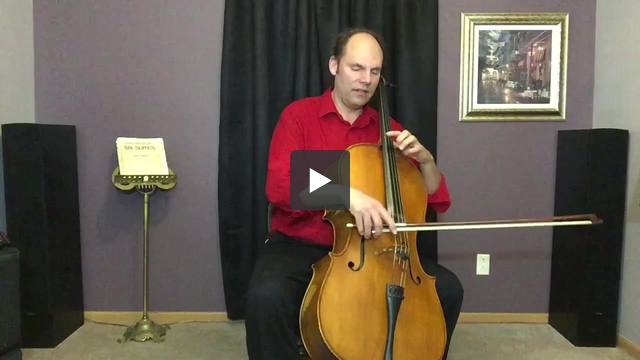
Put the endpin of the cello far enough in so it is out of the way. Take the cello in your hands and aim for the C peg behind the ear of the student and the upper 'hips' of the cello somewhere between the knees with the cello resting on the sternum. You are 90% there. While holding the cello in this position, make a visual note of how far the endpin will need to be pulled out. Pull out the endpin to the desired length and find the same position of the cello again, adjusting the endpin as needed. Be sure the cello is vertical (more on that later) and have the student tilt the cello a little to the right (cellist's perspective).
C-Peg Behind Ear
Why did I recommend the C peg behind the ear? Frankly, the C peg is evil; for most body types it's a crime against posture! And its side kick - the G peg - isn't much better. The ASTA curriculum recommends the C peg to be behind the ear of beginning cellists and it's about the best solution for keeping the C peg out of their way, short of installing a posture peg
or smaller C peg (see my smaller pegs in the video).
Personally, I prefer the C peg to be a bit lower but behind the ear is a perfectly acceptable starting point and works reasonably well.
Keep the Cello in a Straight Line
David Finckel in his Cello Talks
makes a case to keep the cello in a straight line from the endpin all the way to the scroll (not leaning left or right). In fact, Mr. Finckel was at CMU last year and during his master class made his case for the vertical position of the cello.
When the tip of the endpin is placed in the center of our body, the cello will lean towards the left arm of the cellist often causing it to also tilt to the left. This makes it extremely difficult to reach the A string and puts our right shoulders at risk for injury. Moreover, as one plays further up the fingerboard, the string angles more and more to the left, making it more difficult than need be to play in the upper positions.
Instead, try placing the tip of the endpin off center to the left (cellist's perspective) so that the cello is straight (not the leaning tower of Pisa). Now, tilt the cello a little to the right (cellist"s perspective). The two issues mentioned above are solved; it is easier to reach the A string and as you traverse up the strings they do not angle progressively more to the right the higher you play.
Tilt of Cello and Projection
Several years ago in the Staples Family Concert Hall at CMU, my students and I did a little experiment to see if cello tilt effected sound projection.
What we found was that tilting the cello to the right when playing on the A string generally resulted in more projection as did tilting the cello to the left while playing on the C string. This was consistent across instruments and players.
Keep in mind that this test was not fully scientific, meaning it was not double blind (nor could it be). Those listening in the audience seats in different locations around the hall kept their eyes closed and voted on what they heard but the person playing knew which tilt was being used.
A couple points to bear in mind. It is possible the tilt didn't directly cause the increased projection but only made it easier to apply weight into the string. And these results may only apply to this particular hall. But nonetheless, there was fairly consistent agreement that tilt did effect sound projection.
Tilting the cello right while playing the A string not only helps projection, makes it easier to reach with the bow arm, and prevents shoulder injury, but it also allows us to utilize gravity more to our advantage when holding down the string. Instead of the fingerboard having a downhill slope to the left it will feel more like a D string we can rest our finger directly on top of.
Tilting the cello left for the C string also helps it to feel like a D string, enabling us to apply gravity to greater affect.
It's comfortable. Give it a try and see what you think.
The Right Leg is Optional
I sometimes see student cellists holding their instrument a bit tightly with the right leg. Most do not realize that the right leg need not touch the cello at all. If the cello is properly supported, depending on the body type, the right leg or knee is totally optional. In fact, by keeping the right leg off the cello, you may also increase resonance by allowing the cello to vibrate more.
Don't Just Sit There, Do Something!
Back to the C and G pegs.
There comes a moment in most cellist's lives when they have to make a decision; will they patiently endure the C peg or do something about it? If there is anything that proves the long suffering nature of the cellist, it's got to be the C peg (and chairs that are the wrong height!).
Now, depending on your body type and how you hold the cello, you may not have any issues with the C peg. Congratulations! Consider yourself lucky!
To the rest of us, there are a couple great options. One is to have a posture peg
installed in place of the regular C peg, as mentioned above. If you want to go all the way, you can have a G posture peg installed as well. The second option is to shorten your existing pegs and shave down the heads so they are out of the way (see video above). Personally, I opted for the second.
Do either one and you will thank yourself!
S.D.G.
Authored by Jamie Fiste, Professor of Cello at Central Michigan University.