Get in touch
fiste1ja@gmail.com
Do you have an idea for a video or article? Or is there something you'd like to see in the store?
Let me know!
Share

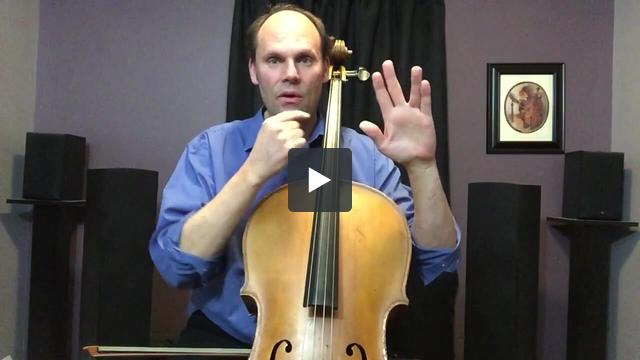
Teaching Finger Spacing on the Cello
By Jamie Fiste, Professor of Cello at Central Michigan University
Share This
Teaching the lower positions to beginning cellists is problematic. The main problem is that the natural spacing between the fingers of the left hand do not line up well with the notes in first position on the fingerboard. As a result, teaching finger spacing on the cello is one of the more challenging tasks for the cello teacher. It is especially difficult for the public school orchestra teacher who must find a way to teach this to an entire group of beginning cellists. The material in this article is born out my own experience of working with students to correct faulty finger spacing. You may be interested in a set of position etudes
in my store that is designed to address the difficulties involved with finger spacing.
To summarize, I prefer to think of finger spacing in conjunction with finger patterns (1 2-4, 1-3 4, 1 x 2 4).
Due to the construction of the left hand, there are different degrees of flexibility between the fingers. For most hands the flexibility between the 2nd and 3rd fingers is much less than between 1-2 and 3-4. Therefore, when the left hand is positioned with the first and 4th fingers in their correct spots on the fingerboard, the finger spacing is usually quite off. What we often observe is,
- The 1st and 2nd fingers tend to be too far apart
- The 2nd and 3rd fingers tend to be too close
- The 3rd and 4th fingers tend to be too far apart
I like to take this a step further and include;
- The 1st and 3rd fingers tend to be too close
- The 2nd and 4th fingers tend to be too close
In other words, the half steps need to be closer (except for the half step between 2 and 3) and the whole steps need to be further apart.
So how can we as cello teachers help correct these finger spacing problems? As mentioned above, I teach finger spacing in conjunction with finger patterns. I will present some technical ideas and finger pattern exercises to assist in teaching finger spacing on the cello. I will also address the concept that is becoming more popular, namely, starting cellists with all the fingers down in contrast to the traditional approach of beginning from the open D string and teaching the 1st finger followed by the 3rd and 4th.
Pronation Helps Finger Spacing
My students all know that I am an advocate of approaching the cello from a more pronated position (backward slant - but not over done) than square, and finger spacing is one reason. I strongly believe that approaching left hand technique with pronation helps immensely with finger spacing. This has been pointed out by many eminent teachers, including William Pleeth, Gerhard Mantel, and Rudolf Matz.
Try this experiment;
Hold your hand in a traditional square left hand position (90 degree angle to strings) on the cello fingerboard and try to spread apart your 2nd and 3rd fingers. This is notoriously difficult for beginning cellists. Now hold your hand with a slant (pronation - don't overdo it) and try spreading apart your 2nd and 3rd fingers. Which is easier? In my experience, it is much easier to create the proper distance between 2 and 3 with a pronated left hand. The reason for this is because one does not have to depend only on the flexibility between the 2nd and 3rd fingers. The 3rd finger can be straightened very slightly to create a larger distance between 2 and 3. This is much less taxing on the hand.
Teach Second Finger Before Third Finger
It is very common in the method books to teach F# (3rd finger) before F-natural. In fact, many method books continue to drill the F# long before the F-natural is introduced. In my experience, this results in a second finger that goes down too close to the 3rd finger with a huge space between the 1st and 2nd fingers. Also, because the 3rd finger is a weak finger, the strong 2nd finger comes close to the 3rd in an effort to assist. So it becomes not only an issue of finger spacing but an issue of finger independence.
Now, when advanced players place the 2nd finger a bit close to the 3rd finger, it is not a particular problem as they can pull the 2nd finger back at any time. However, for a beginning cellist, this can be quite problematic.
By spending too much time on F# before F-natural the student acquires improper muscle memory regarding the spacing between 1 and 2, namely, a spacing that is too far apart. As a result, when the 2nd finger is finally introduced, the student naturally spaces it too far away from the first finger and the muscle memory needs to be undone and relearned.
Instead, I prefer to avoid all of this and teach the 2nd finger (F-natural) after the 1st finger followed immediately by the 3rd finger F# with emphasis on proper spacing. Tunes can then be taught in D major and D minor, which is excellent ear training. If a teacher still prefers to teach F# after the first finger, I highly recommend teaching 2nd finger F-natural soon after.
The advantages to this sequences are;
- The student acquires proper muscle memory for the spacing between 1,2, and 3 from the beginning
- The 3rd finger develops more independence from the 2nd finger
- The student is introduced to the difference between major and minor
"Corney" Sayings for Finger Spacing on the Cello
I always like coming up with corny sayings. I think it helps the students remember concepts. So here are the corny sayings I use to teach finger spacing;
- 1 and 2, Right Next To You!
- 1 and 3, A Stretch There Must Be!
- 2 and 3, A Stretch There Must Be!
- 2 and 4, Stretch a Little More!
- 3 and 4, Right Next Door!
- 1 and 4, Stretch a Little More!
I like to drill these sayings with the students followed by finger patterns.
Finger Pattern Exercises for Finger Spacing on the Cello
These do not have to be elaborate. I usually do a "Call and Response" starting with only two fingers. I remind the student of the saying and proceed to play a pattern with those two fingers and have the student repeat the pattern. This is the order I follow for warm ups when teaching finger spacing with "Call and Response";
- Adjacent fingers (1-2, 2-3, and 3-4)
- Fingers that skip over another finger (1-3, 2-4)
- 3 note finger patterns that use adjacent fingers (1-2-3, 2-3-4)
- 3 note finger patterns that skip over a finger (1-2-4, 1-3-4)
- 4 note finger patters (1-2-3-4, 1-3-4-2, 1-2-4-3, 1-3-2-4, etc.)
What I like about the call and response is that I can monitor the students progress and adjust accordingly. I am always reminding the students of the sayings before I proceed to the next level of finger patterns.
You can also call out a finger pattern and have the student respond with "closer" and "further". For example;
- 1-2: Closer!
- 2-3: Further!
- 2-4: Further!
- 1-3: Further!
- 3-4: Closer!
and
- 1-2-4: Closer-Further!
- 1-3-4: Further-Closer!
- 1-2-3: Closer-Further!
All of these finger patterns using "Call and Response" work great as warm ups and exercises. As the students get better, you can have them do the calls with the teacher and class doing the responses.
Keep drilling these finger patterns and remind the students of the finger spacing and it will go a long way towards developing good intonation and proper finger spacing.
Starting with all the Fingers Down
Perhaps by now you can see why I am uncomfortable with starting cellists with all four fingers down on the G natural. I say this with respect because I know excellent teachers who begin cellists this way. In my opinion, beginning with all four fingers down simply compounds the difficulties of finger spacing. It is rare indeed for a beginning cellist to be able to place all four fingers down simultaneously in the correct spots. In fact, when a beginner places all four fingers down, most often we will observe the very spacing issues we are trying to avoid;
- The 1st and 2nd fingers tend to be too far apart
- The 2nd and 3rd fingers tend to be too close
- The 3rd and 4th fingers tend to be too far apart
If the average beginning cellist is not going to be able to put all four fingers down in the correct spots, then we are reinforcing bad habits and improper muscle memory. It is also detrimental too the ear, as the student begins to hear uneven finger spacing as correct.
Also, by starting with all four fingers down, the finger patterns first learned are likely to be descending patterns, such as in French Folk Song, which is more difficult for proper finger spacing than ascending finger patterns. This approach reinforces the very spacing issues we need to correct.
It is far easier for a beginner to measure finger spacing starting on 1st finger and proceeding upward. This method reinforces proper habits and muscle memory from the start.
Authored by Jamie Fiste, Professor of Cello at Central Michigan University.